HOW TO EDIT CLASSROOM PAGES
This tutorial will teach you how to write, edit and publish your Tutor's Corner posts.
For more help, contact [email protected]
This tutorial will teach you how to write, edit and publish your Tutor's Corner posts.
For more help, contact [email protected]
Each homeroom in the Junior Program has a classroom page on our website. The classroom page functions as a communication centre and landing page for the parents and students where they will find everything they need in the drop-down menus to continue their school work on home days:
NOTE:
you will not be able to navigate through the website while you are logged into Weebly. If you want to click on homework pages, or other links on the webpage, simply open a new window in your browser to www.sjcschola.ca. |
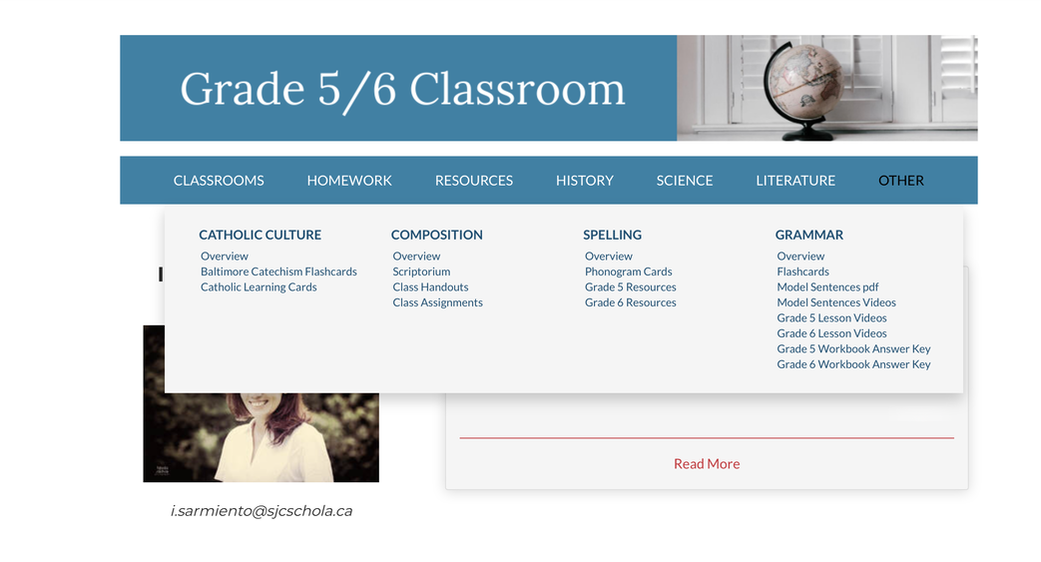
Grade 5/6 Classroom page showing the dropdown menu.
|
Creating a new post
Creating a new post on your Classroom Page is simple. Each step is explained below.
Creating a new post on your Classroom Page is simple. Each step is explained below.
- Login to Weebly with your username and password (email Melanie Blair at [email protected] if you need help)
- Click on 'Edit Website' (top right)Find and click on your Tutor's Corner (scroll through the list on left)
- Click on 'New Post' (bottom right)
- Create your content.
- Click 'Publish'
|
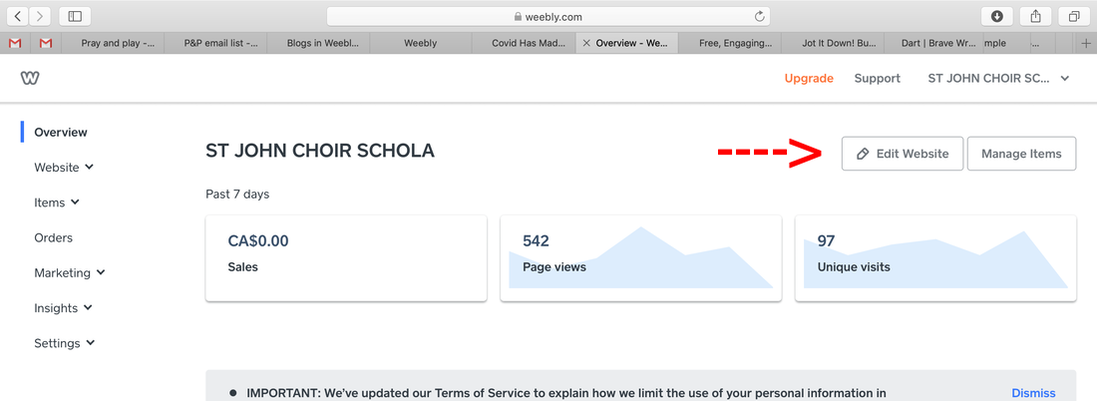
1. Login to Weebly: www.weebly.com
2. You should see something similar to the image on the right. Click on 'Edit Website' to open the editor screen. |
2. Click on 'edit website' in the top right corner
|
3. Find the Classroom Page you wish to edit. You are only able to edit your own classroom -scroll through the list until you find it.
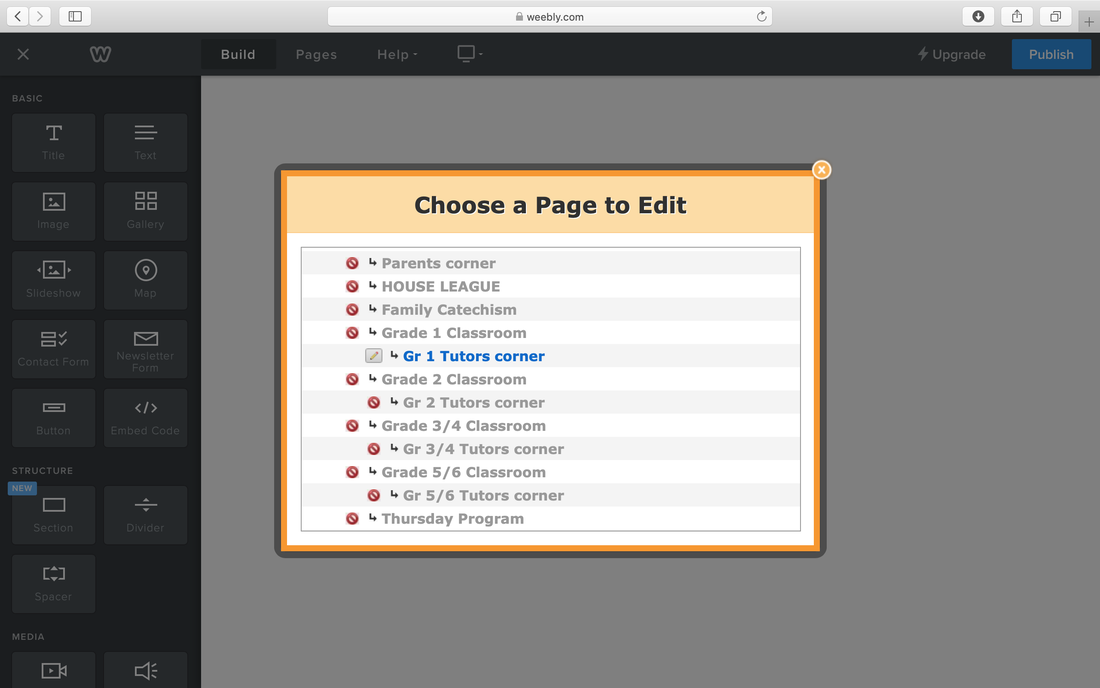
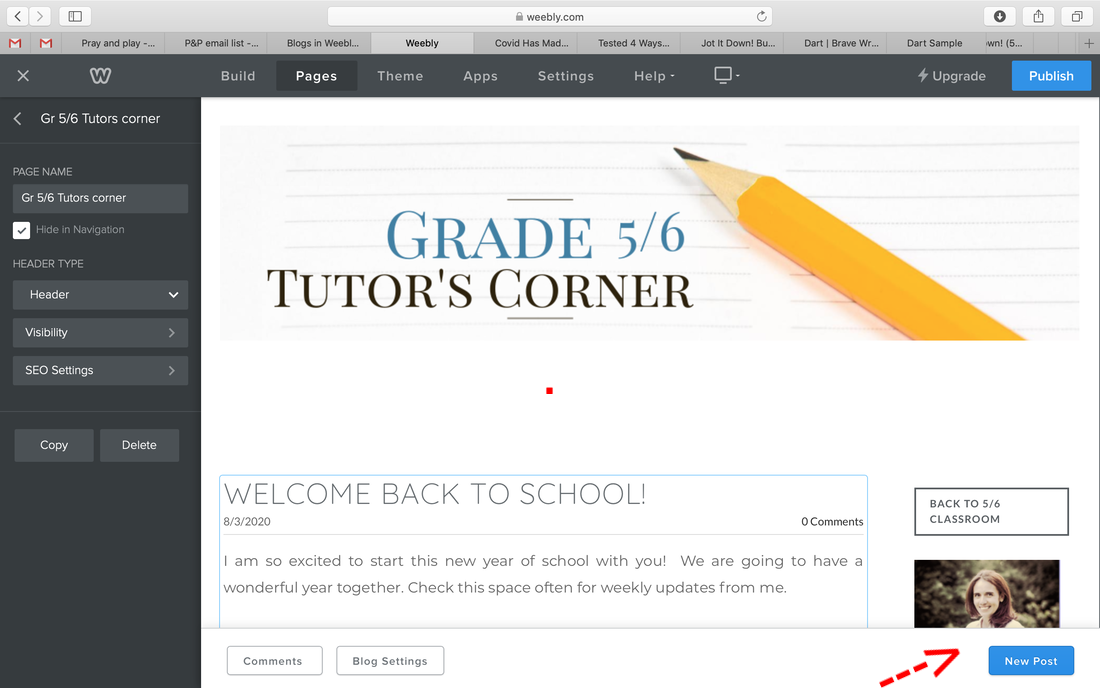
3. Scroll through the list of pages to find your Tutor's Corner and click on it.
4. You will now see your page. To create a new post, click on 'NEW POST' on the bottom right.

Click on 'New Post' to create an update.
5. Start creating your post!
- Add a title by clicking in the Title area. This could be something catchy or just the date.
- From the left-hand sidebar, drag the box labeled 'text' onto the middle of the page to create a text-box. Start typing your text. You can add formatting by highlighting text and using the menu that pops up.
- To add an image, drag the box labeled 'image' into your post. This is useful to highlight student's work, or classroom activities.
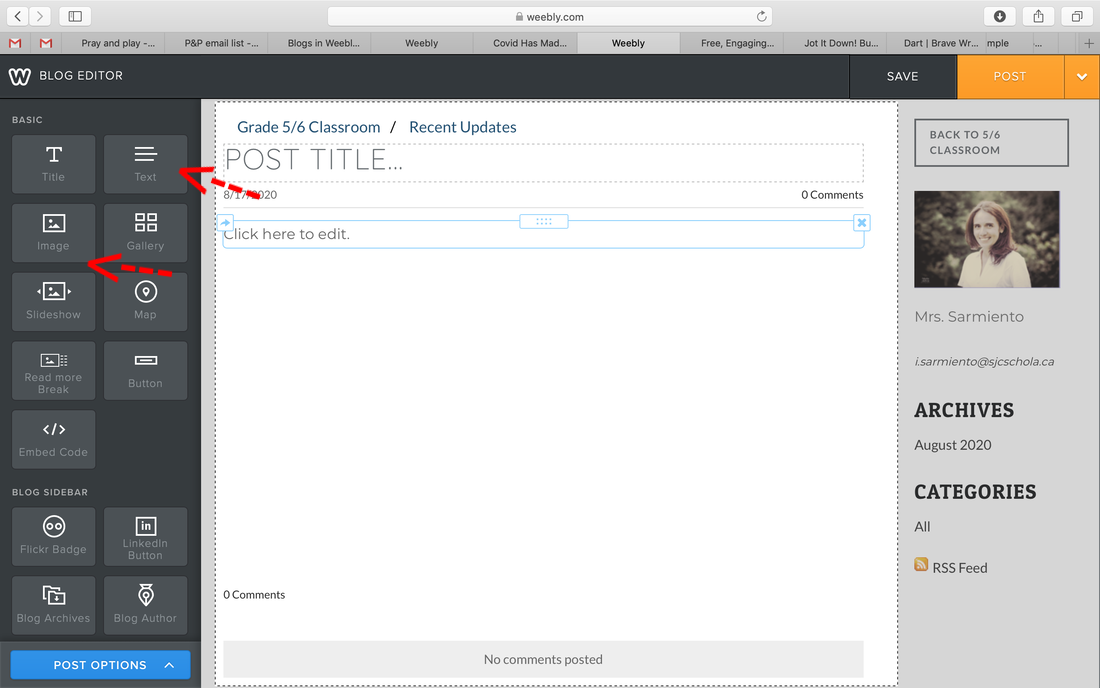
Editing your posts is easy in the weebly editor
6. When you are finished editing, you must publish your post before it will appear on the website. Simply click on 'Publish' on the top-right.
Optional tips for your weekly updates:
- You can create posts ahead of time and click on 'save' instead of 'publish'. This creates a draft post which can be edited and published at a later date. If you have any drafts, they can be found by clicking the 'drafts' button on the bottom right of the editor page. By clicking on 'Post Options' on the bottom left, you can add Categories to your posts, schedule your post to publish automatically at a specified time, etc...
- To delete a post, click on the arrow beside the 'Publish' button.